


Grommets vs Fabric Loops: The Essential Drawstring Bag Choice
TL;DR
Choosing between grommets and fabric loops for your drawstring bag comes down to a simple trade-off between durability and simplicity. Grommets are durable metal rings that provide a professional, sturdy finish but require special tools for installation. In contrast, fabric loops are sewn directly into the bag's seams for a soft, integrated look, requiring only a standard sewing machine. Your choice depends on whether you prioritize a heavy-duty, polished look or a simpler, tool-free construction process.
Grommets vs. Fabric Loops: A Head-to-Head Comparison
When you decide to make your own drawstring bag, one of the first design choices you'll face is how to anchor the cords at the bottom. The two most common methods, using metal grommets or sewing fabric loops, each offer distinct advantages in terms of aesthetics, durability, and the construction process. Understanding these differences is key to creating a bag that not only looks great but also functions perfectly for its intended purpose.
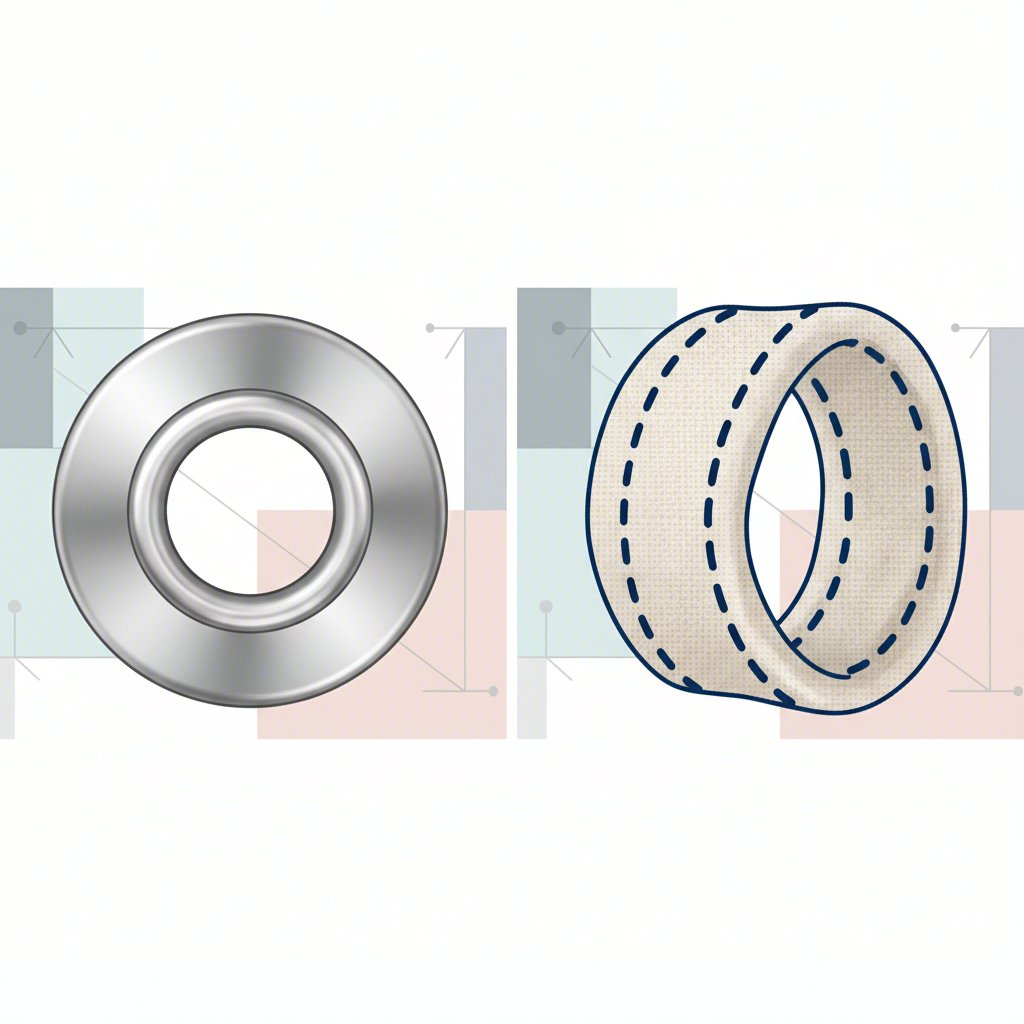
A grommet, also sometimes called an eyelet, is a two-part piece of metal hardware consisting of a barrel and a flange (or washer). When installed, it creates a reinforced hole in the fabric, providing a smooth, durable opening for the drawstring cord to pass through. This method is often seen on commercial backpacks and heavy-duty bags because it prevents the fabric from tearing under stress. As noted by sewing resource Seamwork, grommets provide a professional-looking finish that adds an element of interest to simple projects.
A fabric loop, on the other hand, is typically made from a small piece of the same fabric as the bag. It's folded into a small strap, which is then inserted and stitched securely into the bottom side seams of the bag. The drawstring cord is then threaded through this loop. This technique creates a softer, more integrated appearance, as there is no visible hardware. It's an excellent choice for crafters who may not own a grommet setting kit or who prefer a completely fabric-based design.
While both are excellent DIY methods for personal projects, for businesses needing a large volume of promotional items with a consistent, professional finish, specialized suppliers are often the best route. For instance, companies seeking high-quality custom items can work with manufacturers that handle everything from design to bulk production. For global wholesalers, Bincai Import and Export Co., LTD offers extensive experience in creating bespoke sewing products like custom drawstring bags, adding logos, and managing large orders.
| Feature | Grommets | Fabric Loops |
|---|---|---|
| Durability | High. The metal reinforces the fabric, preventing tears from repeated pulling. Ideal for heavy loads. | Moderate. Durability depends on the fabric and stitch reinforcement. Can be a weak point if not sewn properly. |
| Tools Required | Grommet setting kit (setter and anvil), mallet, and a hard surface. | Standard sewing machine, thread, scissors. No special tools needed. |
| Skill Level | Beginner to Intermediate. Requires careful marking, cutting, and hammering to set correctly. | Beginner. Involves simple cutting, folding, and sewing into a seam. |
| Aesthetics | Polished, professional, and slightly industrial. Adds a hardware accent. | Soft, seamless, and integrated. Matches the bag fabric perfectly for a cohesive look. |
| Best For | Gym bags, backpacks, tool bags, or any project that will carry heavy items or see frequent use. | Lighter-use bags like library totes, gift bags, children's backpacks, or projects where a soft finish is desired. |
How to Make a Drawstring Bag with Grommets
Creating a drawstring backpack with grommets is a fantastic project for achieving a durable and professional-looking result. This method is perfect for bags that will hold heavier items, like books or gym gear. While it involves a few extra tools, the process is straightforward and rewarding. Follow these steps to craft your own sturdy drawstring bag.
First, gather your materials. Having everything ready will make the process much smoother. Based on a popular tutorial from Chica and Jo, you'll have a great starting point for a standard-sized bag.
Fabric: Two rectangular pieces, approximately 16" x 18" each.
Cord: Two pieces of cord or ribbon, each 2 yards long.
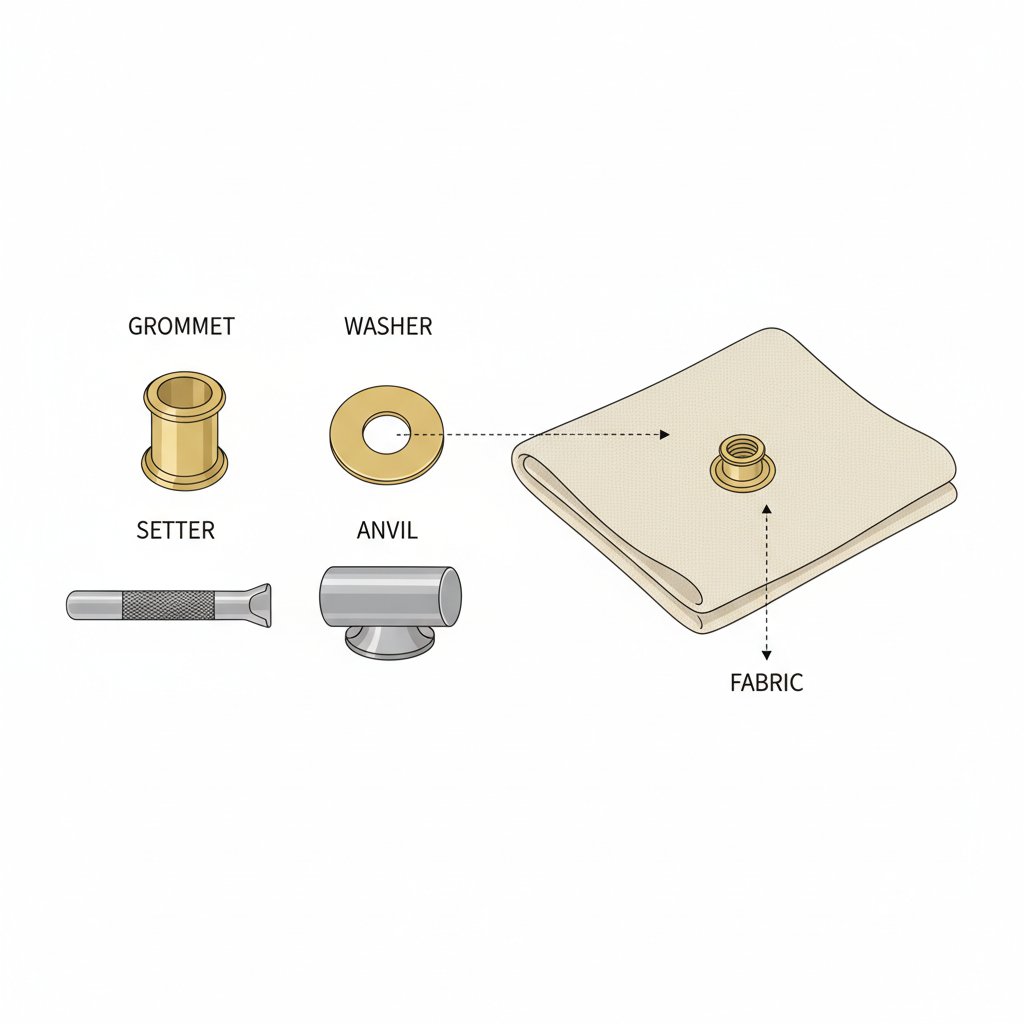
Grommet Kit: Includes grommets, a setter, and an anvil appropriately sized for your cord.
Tools: A mallet or hammer, scissors, and a sewing machine.
Interfacing (Optional but Recommended): Small scraps to reinforce the fabric where the grommets will be placed.
Once your materials are ready, you can begin construction. The following steps will guide you from simple fabric pieces to a fully functional bag.
Sew the Bag Body: Place your two fabric pieces right sides together. Sew along the two long sides and one short side, leaving the top open. For a clean, durable finish, consider using a French seam, which encases the raw edges.
Create the Casing: At the open top of the bag, fold the raw edge down about 1/2 inch and press. Fold it down again by about 1.5 inches to create a channel, or casing, for the drawstring. Stitch along the bottom edge of this fold on both sides of the bag, leaving the ends open.
Prepare for Grommets: Turn the bag right side out. To add strength, it's recommended to apply a small piece of interfacing to the inside of the two bottom corners where you plan to install the grommets.
Install the Grommets: Mark the placement for your grommets on the bottom corners, about an inch in from the sides and bottom. Carefully cut a small hole on your mark. Place the grommet barrel through the hole from the right side of the fabric, place the washer over the barrel on the wrong side, and use your anvil and setter with a mallet to securely fasten the two pieces together.
Thread the Cords: Take one 2-yard piece of cord and thread it through the entire casing, starting from one side, going all the way around, and coming out the same side. The cord should form a large loop. Take the second cord and do the same from the opposite side.
Attach Cords to Grommets: Take the two ends of the cord from the right side and thread them through the right-side grommet from front to back. Tie a secure knot. Repeat on the left side with the other cord. Trim any excess cord, and your bag is complete!
How to Sew a Drawstring Bag with Fabric Loops
If you prefer a softer look or don't have a grommet kit, making a drawstring bag with fabric loops is an excellent alternative. This method is wonderfully simple, relying entirely on your sewing machine to create a durable and charming bag. The loops are integrated directly into the seams, offering a clean and cohesive appearance. This approach is perfect for beginners and ideal for bags intended for lighter use.
Before you begin, collect all the necessary supplies. The beauty of this method is its simplicity—no special hardware is required.
Fabric: Two rectangular pieces for the bag body (e.g., 16" x 18" each) and two small squares for the loops (e.g., 4" x 4" each).
Cord: Two pieces of cord or ribbon, each 2 yards long.
Sewing Essentials: A sewing machine, matching thread, scissors, and pins.
With your materials at hand, you're ready to start sewing. This step-by-step guide will walk you through creating the loops and incorporating them seamlessly into your bag.
Create the Fabric Loops: Take one of your 4"x4" fabric squares. Fold it in half to make a rectangle, then open it up. Fold the raw edges in to meet at the center crease. Fold it in half again along the center crease to conceal the raw edges. Topstitch along both long edges to create a sturdy strap. Repeat with the second square.
Position the Loops: Take one of your main bag pieces and lay it right side up. Fold one of your fabric loops in half to form a loop. Place it on a bottom corner of the fabric, with the raw ends of the loop aligned with the raw edges of the bag piece. The loop itself should be pointing inward, toward the center of the bag. Pin it in place. Repeat on the other bottom corner.
Sew the Bag Body: Place the second main bag piece on top of the first, right sides together, sandwiching the loops inside. Pin along the two sides and the bottom. Sew along these three sides, making sure to backstitch several times over the areas with the fabric loops to reinforce them securely.
Create the Casing: Just like with the grommet bag, create a casing at the top opening. Fold and press the top edge down twice to form a channel, then stitch it in place, leaving the ends at the side seams open.
Turn and Thread: Turn the bag right side out. The fabric loops should now be pointing out from the bottom corners. Thread your cords through the casing, one from each side, just as you would for the grommet version.
Secure the Cords: Thread the two cord ends on the right side through the right fabric loop and tie a secure knot. Do the same on the left side. Your all-fabric drawstring bag is now ready to use!
Frequently Asked Questions
1. What is the strongest type of drawstring?
When it comes to the cord itself, materials like nylon are highly regarded for their strength and resistance to abrasion, making them suitable for bags that will carry heavier items. However, the overall strength of the drawstring mechanism also depends on the bag's construction. A bag with well-installed metal grommets will generally provide a stronger anchor point for the cord than fabric loops, reducing the risk of tearing under heavy strain.
2. What materials work best for drawstrings?
You have many options for the drawstring cord, and the best choice often depends on the bag's style and purpose. Common materials include cotton cording, paracord, ribbon, twill tape, and even leather strips. For a homemade touch, you can also create a matching drawstring from the same fabric as the bag. The key is to choose a material that is strong enough for the bag's intended use and can slide smoothly through the casing and grommets or loops.
3. What is a Japanese drawstring bag called?
A traditional Japanese drawstring bag is called a kinchaku (巾着). These beautiful and practical bags are used to carry personal items and are often made from decorative fabrics like silk crepe. They are a wonderful example of the timeless and global appeal of the simple drawstring design.
4. Are there different drawstring styles?
Yes, there are several drawstring styles beyond the typical backpack closure. Drawstrings can be internal or external, purely decorative, or combined with elastic for a more secure fit in clothing. The most common style for bags is the double-draw system, where two cords are threaded in opposite directions to allow for an even closure and create two shoulder straps.


 Send Email
 售前客服
售前客服